Pet Clinic App
Pet Clinic App
Most of the people, specially who are new to Java Web Application Development, get stuck at learning Spring even though there are lots of great books and courses are available to learn Spring. This is because, what they don't tell you in those books and courses is learning concepts won't help you creating projects. So in this article, we will create a new spring application while learning all the stuff that you need to create your first Spring application.
Step 1 - Spring Initializr
Spring initializr is an online tool which you can access from here which simplifies Spring development. Therefore, our first step will be scaffolding our project using Spring Initializr and running it on IntelliJ IDEA Ultimate Edition (You can use any IDE of your preference but I will be using IntelliJ IDEA Ultimate Edition).
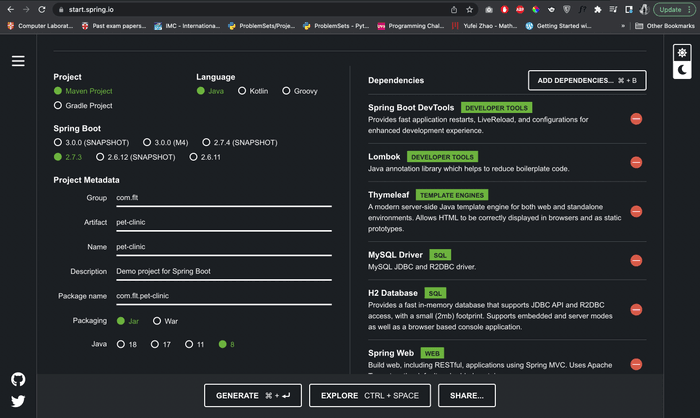
Visit start.spring.io and change the following meta data of the project.
- Project:
Maven - Language:
Java - Spring Boot:
2.7.3 - Group:
com.flt - Artifact:
pet-clinic - Name:
pet-clinic - Description:
Pet Clinic Web Application - Package name:
com.flt.pet-clinic - Packaging:
jar - Java:
8
And add the followind dependencies and press Generate button to download the project zip file.
- Spring Web
- Spring Dev Tools
- Lombok
- Thymeleaf
- MySQL Driver
- H2 Database
- Spring Data JPA
- Spring Boot Actuator
After unzipping the file, open the project using IntelliJ IDEA.
.
├── HELP.md
├── mvnw
├── mvnw.cmd
├── pom.xml
└── src
    ├── main
    │   ├── java
    │   │   └── com.flt.petclinic
    │   │               └── PetClinicApplication.java
    │   └── resources
    │       ├── application.properties
    │       ├── static
    │       └── templates
    └── test
        └── java
            └── com.flt.petclinic
                        └── PetClinicApplicationTests.java
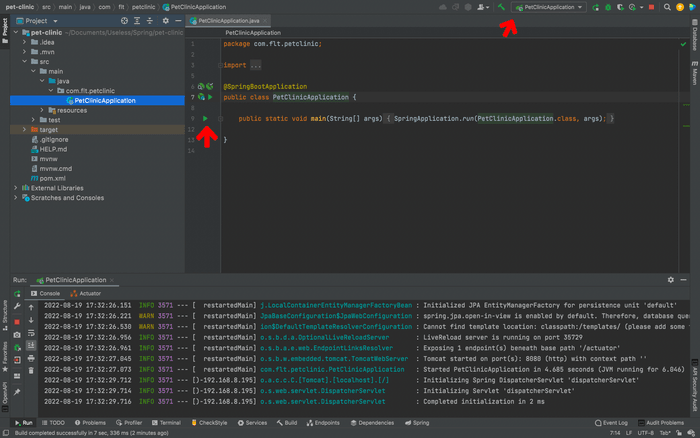
Now, if we want to run the project we can simply go to PetClinicApplication.java file and click the gutter icon or click the PetClinicApplication in the navigation bar. And after some time the application will start up in the default port 8080.
Step 2 - Implement Pet Clinic POJO Data Model
To implement our POJOs, first, we need to create a new package named models inside com.flt.petclinic. Then right click on the model package and select New → Java Class. Then a popup will open with four options Class, Interface, Enum and Annotation. You can use arrow keys to select the type of Java class you need. In our case, we need the default Class. So, we will select it and type Person for its name. Inside that Person class we will declare two attributes, firstName and lastName. After declaring the attributes you can press command + N (in Mac) to generate getters and setters (Shortcuts for Windows and Linux users).
package com.flt.petclinic.model;

public class Person {

    private String firstName;
    private String lastName;

    public String getFirstName() {

        return firstName;
    }

    public void setFirstName(String firstName) {

        this.firstName = firstName;
    }

    public String getLastName() {

        return lastName;
    }

    public void setLastName(String lastName) {

        this.lastName = lastName;
    }
}
After creating Person class we will create four more classes for Vet, Owner, PetType and Pet.
package com.flt.petclinic.model;

public class Vet extends Person{

}package com.flt.petclinic.model;
public class Owner extends Person{
}package com.flt.petclinic.model;
public class PetType {
private String name;
public String getName() {
return name;
}
public void setName(String name) {
this.name = name;
}
}package com.flt.petclinic.model;
import java.time.LocalDate;
public class Pet {
private PetType petType;
private Owner owner;
private LocalDate birthDate;
public PetType getPetType() {
return petType;
}
public void setPetType(PetType petType) {
this.petType = petType;
}
public Owner getOwner() {
return owner;
}
public void setOwner(Owner owner) {
this.owner = owner;
}
public LocalDate getBirthDate() {
return birthDate;
}
public void setBirthDate(LocalDate birthDate) {
this.birthDate = birthDate;
}
}The POJOs we created are the basic ones that we will be working on. But, as the project go, we will be implementing new attributes to incorporate new features to the project.
Step 3 - Create Mult-Module Project for Data Model
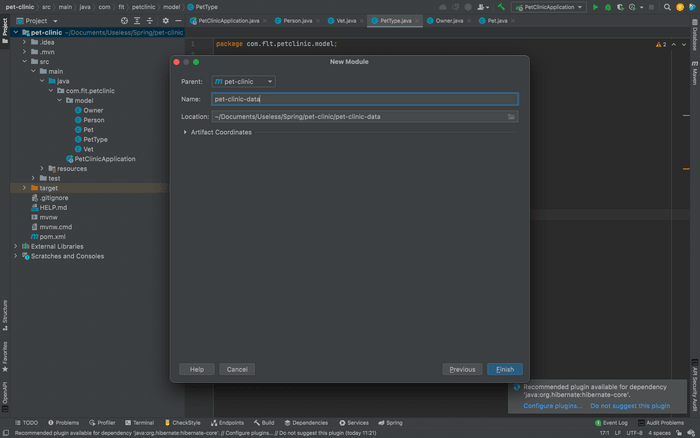
Although, we can create our pet-clinic application as a single module, it is important to know about how to create multi-module projects in Spring. We will be creating two modules, pet-clinic-data and pet-clinic-web and refator the POJOs we built accordingly. To create new modules right click on our project pet-clinic and select New → Module. From the pop-up select Maven as the module type and press Next. Give the name of the project as pet-clinic-data and press Finish.
Create another module named pet-clinic-web using the same way mentioned above.
After creting the two modules, create a new package in pet-clinic-web/src/main/java named com.flt.petclinic and drag and drop the PetClinicApplication.java file to that package. And a pop-up will come aksing whether you need to move the file or not. Click refactor to move the file to the pet-clinic-web module. Then move the resources of the root project to pet-clinic-web/src/main/resources as well. After that, create another new package in pet-clinic-web/src/test/java named com.flt.petclinic and drag and drop the PetClinicApplicationTests.java file to that package.
After moving those to the pet-clinic-web, move the com.flt.petclinic in the root project (which has model package) to the pet-clinic-data/main/java folder. After moving every file in the pet-clinic/src folder of the root project you can delete the pet-clinic/src folder from the root project. After all these moving around things, your project will look like this.
.
├── HELP.md
├── mvnw
├── mvnw.cmd
├── pet-clinic-data
│   ├── pom.xml
│   └── src
│       ├── main
│       │   ├── java
│       │   │   └── com.flt.petclinic
│       │   │               └── model
│       │   │                   ├── Owner.java
│       │   │                   ├── Person.java
│       │   │                   ├── Pet.java
│       │   │                   ├── PetType.java
│       │   │                   └── Vet.java
│       │   └── resources
│       └── test
│           └── java
├── pet-clinic-web
│   ├── pom.xml
│   └── src
│       ├── main
│       │   ├── java
│       │   │   └── com.flt.petclinic
│       │   │               └── PetClinicApplication.java
│       │   └── resources
│       │       ├── application.properties
│       │       ├── static
│       │       └── templates
│       └── test
│           └── java
│               └── com.flt.petclinic
│                           └── PetClinicApplicationTests.java
└── pom.xml
After moving the packages and Java files, we need to edit the respective pom.xml files too. Rather than, telling you what to cut and copy in the respective pom.xml files, refer the following pom.xml files to configure the relevant dependencies accordingly.
<?xml version="1.0" encoding="UTF-8"?>
<project xmlns="http://maven.apache.org/POM/4.0.0" xmlns:xsi="http://www.w3.org/2001/XMLSchema-instance"
	xsi:schemaLocation="http://maven.apache.org/POM/4.0.0 https://maven.apache.org/xsd/maven-4.0.0.xsd">
	<modelVersion>4.0.0</modelVersion>
    <packaging>pom</packaging>
    <modules>
        <module>pet-clinic-data</module>
        <module>pet-clinic-web</module>
    </modules>
    <parent>
		<groupId>org.springframework.boot</groupId>
		<artifactId>spring-boot-starter-parent</artifactId>
		<version>2.7.3</version>
		<relativePath/> <!-- lookup parent from repository -->
	</parent>
	<groupId>com.flt</groupId>
	<artifactId>pet-clinic</artifactId>
	<version>0.0.1-SNAPSHOT</version>
	<name>pet-clinic</name>
	<description>Pet Clinic Web Application</description>
	<properties>
		<java.version>1.8</java.version>
	</properties>

	<dependencies>

	</dependencies>

	<build>
		<plugins>
			<plugin>
				<groupId>org.springframework.boot</groupId>
				<artifactId>spring-boot-maven-plugin</artifactId>
				<configuration>
					<excludes>
						<exclude>
							<groupId>org.projectlombok</groupId>
							<artifactId>lombok</artifactId>
						</exclude>
					</excludes>
				</configuration>
			</plugin>
		</plugins>
	</build>

</project><?xml version="1.0" encoding="UTF-8"?>
<project xmlns="http://maven.apache.org/POM/4.0.0"
xmlns:xsi="http://www.w3.org/2001/XMLSchema-instance"
xsi:schemaLocation="http://maven.apache.org/POM/4.0.0 http://maven.apache.org/xsd/maven-4.0.0.xsd">
<parent>
<artifactId>pet-clinic</artifactId>
<groupId>com.flt</groupId>
<version>0.0.1-SNAPSHOT</version>
</parent>
<modelVersion>4.0.0</modelVersion>
<artifactId>pet-clinic-data</artifactId>
<properties>
<maven.compiler.source>8</maven.compiler.source>
<maven.compiler.target>8</maven.compiler.target>
<spring-boot.repackage.skip>true</spring-boot.repackage.skip>
</properties>
<dependencies>
<dependency>
<groupId>org.springframework.boot</groupId>
<artifactId>spring-boot-starter-data-jpa</artifactId>
</dependency>
<dependency>
<groupId>com.h2database</groupId>
<artifactId>h2</artifactId>
<scope>runtime</scope>
</dependency>
<dependency>
<groupId>mysql</groupId>
<artifactId>mysql-connector-java</artifactId>
<scope>runtime</scope>
</dependency>
<dependency>
<groupId>org.projectlombok</groupId>
<artifactId>lombok</artifactId>
<optional>true</optional>
</dependency>
<dependency>
<groupId>org.springframework.boot</groupId>
<artifactId>spring-boot-starter-test</artifactId>
<scope>test</scope>
</dependency>
</dependencies>
<build>
<plugins>
<plugin>
<groupId>org.springframework.boot</groupId>
<artifactId>spring-boot-maven-plugin</artifactId>
<configuration>
<excludes>
<exclude>
<groupId>org.projectlombok</groupId>
<artifactId>lombok</artifactId>
</exclude>
</excludes>
</configuration>
<executions>
<execution>
<goals>
<goal>repackage</goal>
</goals>
</execution>
</executions>
</plugin>
</plugins>
</build>
</project><?xml version="1.0" encoding="UTF-8"?>
<project xmlns="http://maven.apache.org/POM/4.0.0"
xmlns:xsi="http://www.w3.org/2001/XMLSchema-instance"
xsi:schemaLocation="http://maven.apache.org/POM/4.0.0 http://maven.apache.org/xsd/maven-4.0.0.xsd">
<parent>
<artifactId>pet-clinic</artifactId>
<groupId>com.flt</groupId>
<version>0.0.1-SNAPSHOT</version>
</parent>
<modelVersion>4.0.0</modelVersion>
<artifactId>pet-clinic-web</artifactId>
<properties>
<maven.compiler.source>8</maven.compiler.source>
<maven.compiler.target>8</maven.compiler.target>
</properties>
<dependencies>
<dependency>
<artifactId>pet-clinic-data</artifactId>
<groupId>com.flt</groupId>
<version>0.0.1-SNAPSHOT</version>
</dependency>
<dependency>
<groupId>org.springframework.boot</groupId>
<artifactId>spring-boot-devtools</artifactId>
<scope>runtime</scope>
<optional>true</optional>
</dependency>
<dependency>
<groupId>org.springframework.boot</groupId>
<artifactId>spring-boot-starter-test</artifactId>
<scope>test</scope>
</dependency>
<dependency>
<groupId>org.springframework.boot</groupId>
<artifactId>spring-boot-starter-actuator</artifactId>
</dependency>
<dependency>
<groupId>org.springframework.boot</groupId>
<artifactId>spring-boot-starter-thymeleaf</artifactId>
</dependency>
<dependency>
<groupId>org.springframework.boot</groupId>
<artifactId>spring-boot-starter-web</artifactId>
</dependency>
</dependencies>
</project>One important thing to notice in these pom.xml files is that, since we are using pet-clinic-data artifact in the pet-clinic-web module, we need to have a lean jar package of pet-clinic-data instead of a fat jar. As you can see, to have a lean jar we have included set of configurations in the <build>...</build> tag of pet-clinic-data.
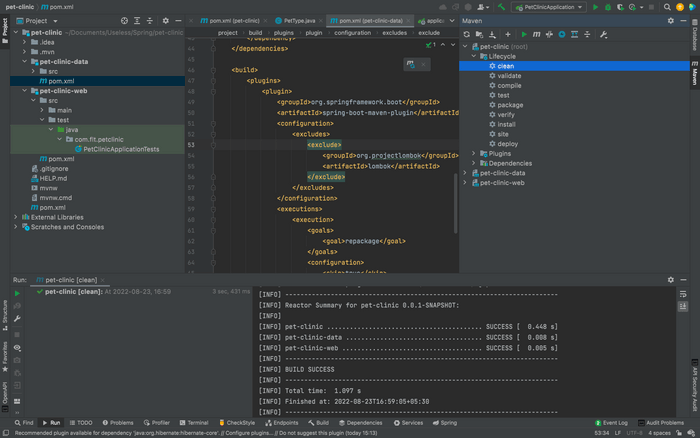
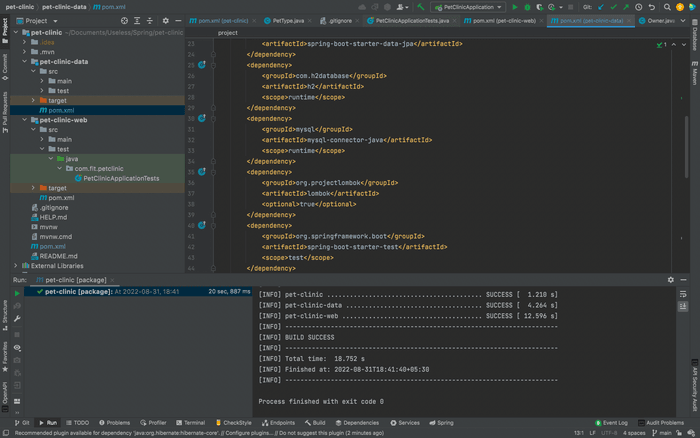
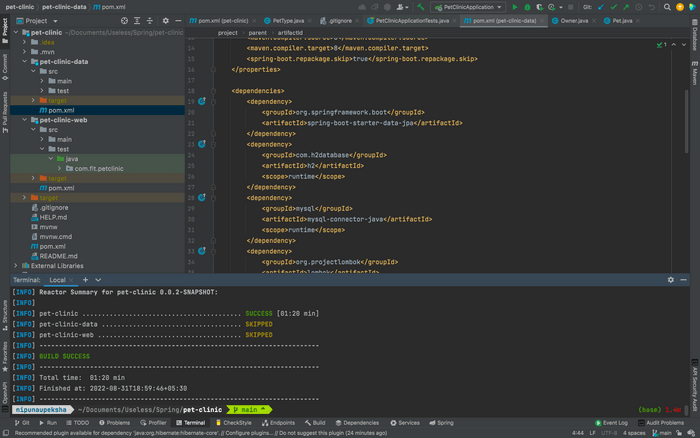
Now, to check whether our multi-module project works as expected, click the Maven tab in the right-side pane of IntelliJ and select pet-clinic(root) → Lifecycle and double click on clean. If all things are configured correctly you will see the following, in the terminal.
After that, click on package to see whether it is packaging properly.
Step 4 - Using a Version Control System for our Project
When creating a project it is always better to use a version control system, since we don't know when our data might be lost if we are only backing up the project in our local machine. There are quite a few version controlling systems like, github, gitlab and bitbucket in industry. But the most popular one among them is github. So in this project we will use github to do our version controlling.
To use github, you need to have an account. You can create one by going to github homepage
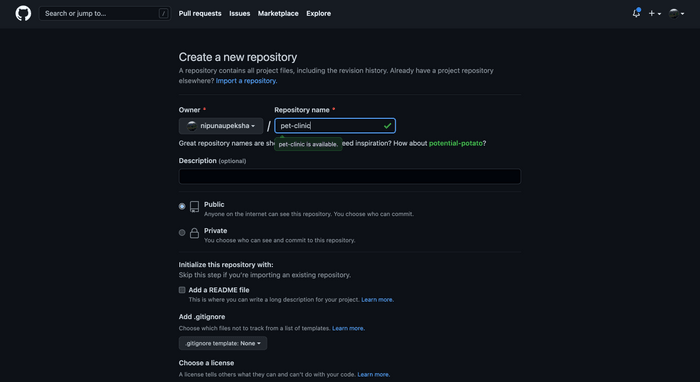
After creating a github account, you can go to the repositories and create a new repository by clicking on the new button. Give the repository name as pet-clinic and press Create Repository button.
After that, go to the directory containing your project and open git bash. To install git bash to your local machine you can follow the instructions given by official documentation After opening the git bash you can run the following commands in order to make your first commit.
echo "# pet-clinic" >> README.mdgit initgit add README.mdgit commit -m "first commit"git branch -M maingit remote add origin git@github.com:<your_github_username>/pet-clinic.gitgit push -u origin main
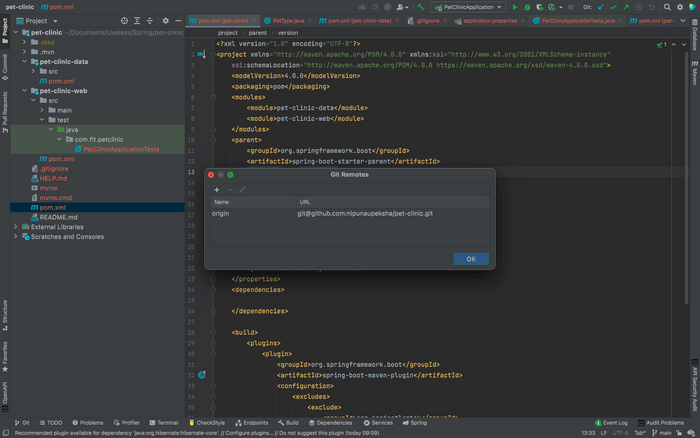
After making your first commit, go to your project at InteiiJ and you will see all the files except README.md file has been marked in red. This is because we haven't committed the files we already have on our project. To make things easier, we will set up the VCS(Version Control System) configurations in IntelliJ and use them. To add your github account to IntelliJ you can use the documentation provided by JetBrains team. After linking the github profile, open the Manage Remotes by Git → Manage Remotes or double tapping Shift key and searching for Manage Remotes to check your origin is properly set up.
Now, before committing all of the things we have done so far, let's first edit the .gitignore file a bit since we do not want to commit unwanted files in to our repository.
######################
# Project Specific
######################
/build/www/**
/src/test/javascript/coverage/
/src/test/javascript/PhantomJS*/

######################
# Node
######################
/node/
node_tmp/
node_modules/
npm-debug.log.*

######################
# SASS
######################
.sass-cache/

######################
# Eclipse
######################
*.pydevproject
.project
.metadata
tmp/
tmp/**/*
*.tmp
*.bak
*.swp
*~.nib
local.properties
.classpath
.settings/
.loadpath
.factorypath
/src/main/resources/rebel.xml

# External tool builders
.externalToolBuilders/**

# Locally stored "Eclipse launch configurations"
*.launch

# CDT-specific
.cproject

# PDT-specific
.buildpath

######################
# Intellij
######################
.idea/
*.iml
*.iws
*.ipr
*.ids
*.orig

######################
# Visual Studio Code
######################
.vscode/

######################
# Maven
######################
/log/
/target/

######################
# Gradle
######################
.gradle/
/build/

######################
# Package Files
######################
*.jar
*.war
*.ear
*.db

######################
# Windows
######################
# Windows image file caches
Thumbs.db

# Folder config file
Desktop.ini

######################
# Mac OSX
######################
.DS_Store
.svn

# Thumbnails
._*

# Files that might appear on external disk
.Spotlight-V100
.Trashes

######################
# Directories
######################
/bin/
/deploy/
target/

######################
# Logs
######################
*.log

######################
# Others
######################
*.class
*.*~
*~
.merge_file*

######################
# Gradle Wrapper
######################
!gradle/wrapper/gradle-wrapper.jar

######################
# Maven Wrapper
######################
!.mvn/wrapper/maven-wrapper.jar

######################
# ESLint
######################
.eslintcache
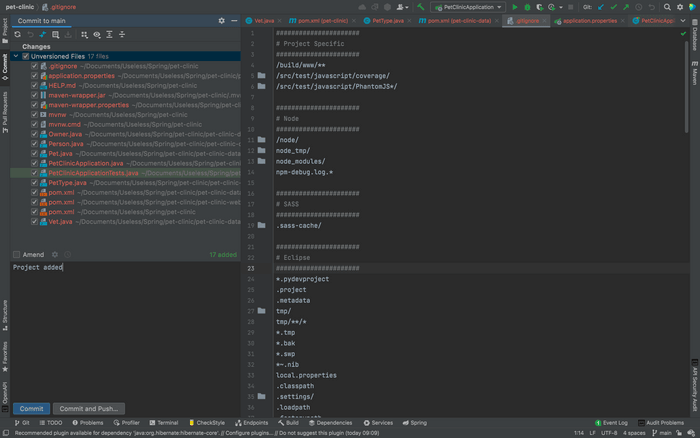
After, editing .gitignore file, commit the project by opening the tab at left pane saying commit. At there, type your commit message and click Commit and Push to commit and push the changes at the same time.
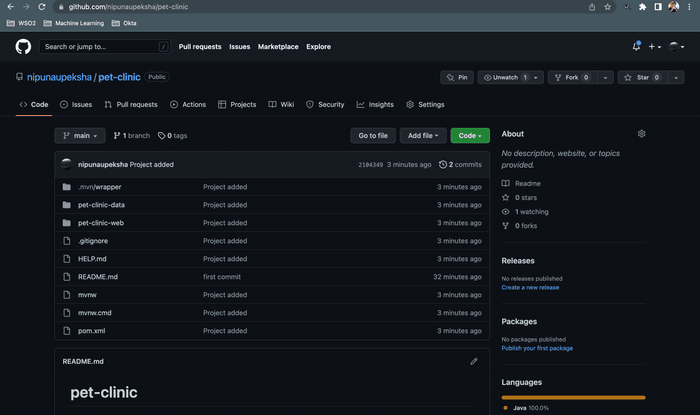
Now if you go to your repository, you can see that all of your code which are not in .gitigore file has been uploaded nicely.
It is better to commit frequently to make sure your code is not up to date with the VCS. I will not mention about committing from here on. But please make sure to commit frequently atleast at the end of the steps mentioned to make the repository up to date.
Step 5 - Using Maven Release Plugin
Maven release plugin helps you to generate releases of your artifacts with the help of Maven. Although, this a neat tool, there are quite a few plugins to cater releasing artifacts. To start with maven release plugin we will tweak the parent pom.xml a little bit.
<?xml version="1.0" encoding="UTF-8"?>
<project xmlns="http://maven.apache.org/POM/4.0.0" xmlns:xsi="http://www.w3.org/2001/XMLSchema-instance"
	xsi:schemaLocation="http://maven.apache.org/POM/4.0.0 https://maven.apache.org/xsd/maven-4.0.0.xsd">
	<modelVersion>4.0.0</modelVersion>
    <packaging>pom</packaging>
    <modules>
        <module>pet-clinic-data</module>
        <module>pet-clinic-web</module>
    </modules>
    <parent>
		<groupId>org.springframework.boot</groupId>
		<artifactId>spring-boot-starter-parent</artifactId>
		<version>2.7.3</version>
		<relativePath/> <!-- lookup parent from repository -->
	</parent>
	<groupId>com.flt</groupId>
	<artifactId>pet-clinic</artifactId>
	<version>0.0.1-SNAPSHOT</version>
	<name>pet-clinic</name>
	<description>Pet Clinic Web Application</description>
	<properties>
		<java.version>1.8</java.version>
	</properties>

	<build>
		<plugins>
			<plugin>
				<groupId>org.springframework.boot</groupId>
				<artifactId>spring-boot-maven-plugin</artifactId>
				<configuration>
					<excludes>
						<exclude>
							<groupId>org.projectlombok</groupId>
							<artifactId>lombok</artifactId>
						</exclude>
					</excludes>
				</configuration>
			</plugin>
			<plugin>
				<groupId>org.apache.maven.plugins</groupId>
				<artifactId>maven-release-plugin</artifactId>
				<configuration>
					<goals>install</goals>
					<autoVersionSubmodules>true</autoVersionSubmodules>
				</configuration>
			</plugin>
		</plugins>
	</build>

	<scm>
		<developerConnection>scm:git:git@github.com:<user_name>/pet-clinic.git</developerConnection>
		<tag>HEAD</tag>
	</scm>
</project>
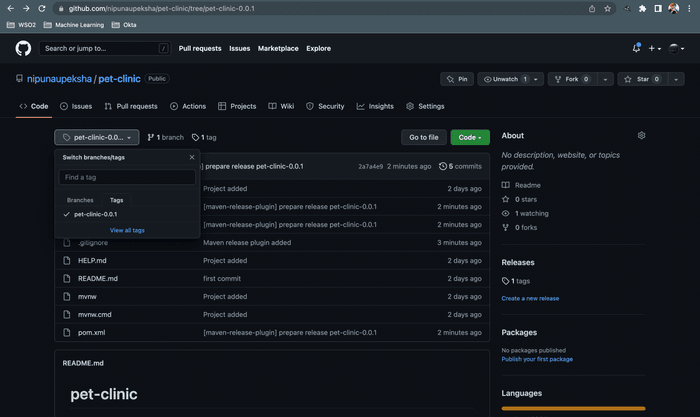
After adding the maven-release-plugin and pushing those changes to git, type mvn release:prepare in terminal to make sure everything is right. If everything went smoothly you will see the BUILD SUCCESS in IntelliJ IDEA terminal and the following in the git repository.
If you see the sub-modules have been SKIPPED it is because we have added <autoVersionSubModules>true</autoVersionSubModules>. And you may notice that, there are few backup files have been created as well.
After mvn release:prepare we can run mvn release:perform
After mvn release:perform you can see that the unwanted backup files have been removed and we have performed the release correctly. So what is the difference between prepare and perform. The prepare method makes sure the git has a release under the tag we specified and perform makes sure to take that release from git and build it locally. If you go to ./target/checkout/pom.xml you will notice that the version is not an SNAPSHOT version but a real release version.
Step 6 - Services
In this section we will create services to interact with repositories and controllers that we will look at next. So basically what we are going to do is, we are using repositories to get the data from the database and use services to manipulate those data to get results. After that, those results are sent to the controllers to either show them send them in the response. To do that we will first create a new package in pet-clinic-data module. After adding that package our folder structure would look like this.
.
├── HELP.md
├── README.md
├── mvnw
├── mvnw.cmd
├── pet-clinic-data
│   ├── pom.xml
│   ├── src
│   │   ├── main
│   │   │   ├── java
│   │   │   │   └── com.flt.petclinic
│   │   │   │               ├── model
│   │   │   │               │   ├── Owner.java
│   │   │   │               │   ├── Person.java
│   │   │   │               │   ├── Pet.java
│   │   │   │               │   ├── PetType.java
│   │   │   │               │   └── Vet.java
│   │   │   │               └── services
│   │   │   └── resources
│   │   └── test
│   │       └── java
│   └── target
├── pet-clinic-web
│   ├── pom.xml
│   ├── src
│   │   ├── main
│   │   │   ├── java
│   │   │   │   └── com.flt.petclinic
│   │   │   │               └── PetClinicApplication.java
│   │   │   └── resources
│   │   │       ├── application.properties
│   │   │       ├── static
│   │   │       └── templates
│   │   └── test
│   │       └── java
│   │           └── com.flt.petclinic
│   │                       └── PetClinicApplicationTests.java
│   └── target
├── pom.xml
└── target
Then inside that services package we will create three new interfaces. The reasons we create these as interfaces first is to follow the Interface Segregation Principle in SOLID principles and to use dependency injection. Inside that service, we will intorduce few methods as well.
package com.flt.petclinic.services;

import com.flt.petclinic.model.Owner;

import java.util.Set;

public interface OwnerService {

    Owner findByLastName(String lastName);

    Owner findById(Long id);

    Owner save(Owner owner);

    Set<Owner> findAll();
}package com.flt.petclinic.services;
import com.flt.petclinic.model.Pet;
import java.util.Set;
public interface PetService {
Pet findById(Long id);
Pet save(Pet owner);
Set<Pet> findAll();
}package com.flt.petclinic.services;
import com.flt.petclinic.model.Vet;
import java.util.Set;
public interface VetService {
Vet findById(Long id);
Vet save(Vet vet);
Set<Vet> findAll();
}Step 7 - Implement Base Entity
Since we need id attribute in our model classes to get the value from database, we need to add it as an attribute too. But, we need to add the getters and setters to every model class. That is not efficient and if we need to add another common attribute we have to add that and the getters and setters to every model class as well. So we can overcome this issue by creating a BaseEntity and inherit them from it.
package com.flt.petclinic.model;

import java.io.Serializable;

public class BaseEntity implements Serializable {

    private Long id;

    public Long getId() {

        return id;
    }

    public void setId(Long id) {

        this.id = id;
    }
}
After creating BaseEntity class we make sure Pet, PetType and Person classes inherit it. We don't need to inherit it to Vet and Owner since they are getting inheritance from Person class.
package com.flt.petclinic.model;

public class Person extends BaseEntity{

    private String firstName;
    private String lastName;

    public String getFirstName() {

        return firstName;
    }

    public void setFirstName(String firstName) {

        this.firstName = firstName;
    }

    public String getLastName() {

        return lastName;
    }

    public void setLastName(String lastName) {

        this.lastName = lastName;
    }
}package com.flt.petclinic.model;
import java.time.LocalDate;
public class Pet extends BaseEntity{
private PetType petType;
private Owner owner;
private LocalDate birthDate;
public PetType getPetType() {
return petType;
}
public void setPetType(PetType petType) {
this.petType = petType;
}
public Owner getOwner() {
return owner;
}
public void setOwner(Owner owner) {
this.owner = owner;
}
public LocalDate getBirthDate() {
return birthDate;
}
public void setBirthDate(LocalDate birthDate) {
this.birthDate = birthDate;
}
}package com.flt.petclinic.model;
public class PetType extends BaseEntity{
private String name;
public String getName() {
return name;
}
public void setName(String name) {
this.name = name;
}
}Step 8 - Custom Banner
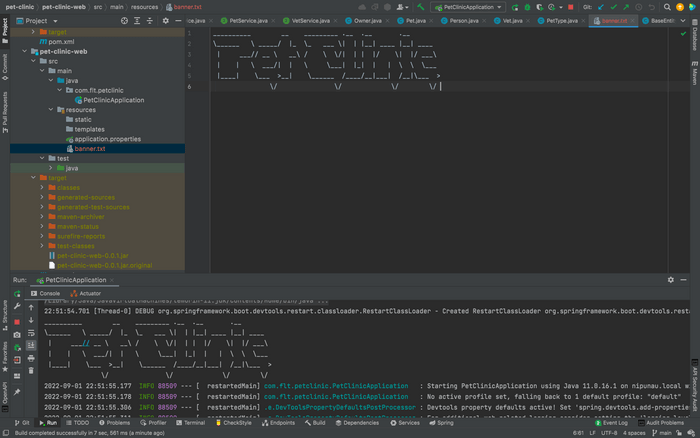
Since we coded a little bit, if you run the PetClinicApplication in pet-clinic-web you will see an ASCII key art. So now, we are going to change that to our application name. Let's first look at how you can add an ASCII art as name. To do that visit patorjk.com and type Pet Clinic Application as the text and copy the ASCII art. Then go to pet-clinic-web/src/main/resources/ and create a new text file named banner.txt and paste the ASCII art there. And now, if you run PetClinicApplication you will see the following.
But, what if we need to have file name as petclinic.txt and not as banner.txt? Then we need to add that as a application property to the application.properties file since banner.txt is the default value.
spring.banner.location=classpath:petclinic.txtIf you need to add an image as your custom banner, you can do it as well by adding the file to resources directory and setting it in the application.properties file.
spring.banner.image.location=classpath:petclinic.png
spring.banner.image.width=100
spring.banner.image.height=100
spring.banner.image.margin=8
Step 9 - Refactor Services to Common Interface
Although we created the service interfaces, we can see that they all have findAll(), findById() and save() methods. So what we can do here is use a common interface to have those methods.
package com.flt.petclinic.services;

import java.util.Set;

public interface CrudService<T, ID> {

    Set<T> findAll();

    T findById(ID id);

    T save(T object);

    void delete(T object);

    void deleteById(ID id);
}
You can see that I have used generics here, to be compatible with all of our other service interfaces. If you want to learn more about Java generics you can go to this link.
After implementing the CrudService we can extend that to inherit the methods.
package com.flt.petclinic.services;

import com.flt.petclinic.model.Vet;

public interface VetService extends CrudService<Vet, Long> {

}package com.flt.petclinic.services;
import com.flt.petclinic.model.Owner;
public interface OwnerService extends CrudService<Owner, Long> {
Owner findByLastName(String lastName);
}package com.flt.petclinic.services;
import com.flt.petclinic.model.Pet;
public interface PetService extends CrudService<Pet, Long>{
}Step 10 - Implement Map Based Services
To implement map based services, let's first create a new directory inside the services named as map. And inside that we will create a new abstract class named AbstractMapService.
package com.flt.petclinic.services.map;

import java.util.HashMap;
import java.util.HashSet;
import java.util.Map;
import java.util.Set;

public abstract class AbstractMapService<T, ID> {

    protected Map<ID, T> map = new HashMap<>();

    Set<T> findAll() {

        return new HashSet<>(map.values());
    }

    T findById(ID id) {

        return map.get(id);
    }

    T save(ID id, T object) {

        map.put(id, object);
        return object;
    }

    void deleteById(ID id) {

        map.remove(id);
    }

    void delete(T object) {

        map.entrySet().removeIf(entry -> entry.getValue().equals(object));
    }
}
Using this AbstractMapService we can create three new classes OwnerServiceMap, PetServiceMap and VetServiceMap.
package com.flt.petclinic.services.map;

import com.flt.petclinic.model.Owner;
import com.flt.petclinic.services.CrudService;

import java.util.Set;

public class OwnerServiceMap extends AbstractMapService<Owner, Long> implements CrudService<Owner, Long> {

    @Override
    public Set<Owner> findAll() {

        return super.findAll();
    }

    @Override
    public void deleteById(Long id) {

    }

    @Override
    public void delete(Owner object) {

    }

    @Override
    public Owner save(Owner object) {

        return super.save(object.getId(), object);
    }

    @Override
    public Owner findById(Long id) {

        return super.findById(id);
    }
}package com.flt.petclinic.services.map;
import com.flt.petclinic.model.Vet;
import com.flt.petclinic.services.CrudService;
import java.util.Set;
public class VetServiceMap extends AbstractMapService<Vet, Long> implements CrudService<Vet, Long> {
@Override
public Set<Vet> findAll() {
return super.findAll();
}
@Override
public void deleteById(Long id) {
super.deleteById(id);
}
@Override
public void delete(Vet object) {
super.delete(object);
}
@Override
public Vet save(Vet object) {
return super.save(object.getId(), object);
}
@Override
public Vet findById(Long id) {
return super.findById(id);
}
}package com.flt.petclinic.services.map;
import com.flt.petclinic.model.Pet;
import com.flt.petclinic.services.CrudService;
import java.util.Set;
public class PetServiceMap extends AbstractMapService<Pet, Long> implements CrudService<Pet, Long> {
@Override
public Set<Pet> findAll() {
return super.findAll();
}
@Override
public void deleteById(Long id) {
super.deleteById(id);
}
@Override
public void delete(Pet object) {
super.delete(object);
}
@Override
public Pet save(Pet object) {
return super.save(object.getId(), object);
}
@Override
public Pet findById(Long id) {
return super.findById(id);
}
}Step 11 - Create Index Page and Controller
Here, we will be creating an index page using HTML and direct to it using the controller. To create our index page, we can go to the pet-clinic-web/src/main/resources/templates and create a new file named index.html.
<!DOCTYPE html>
<html lang="en" xmlns:th="http://www.thymeleaf.org">
    <head>
        <meta charset="UTF-8"/>
        <title>Pet Clinic Index</title>
    </head>
    <body>
        <h1 th:text="Index page">Index page</h1>
    </body>
</html>
Since, in the beginning of the article we mentioned that we will be using Thymeleaf as the web templating engine for our project, you can see that I have added the Thymeleaf namespace in here as well.
Now, we can create our controller class to which will direct us to that page. To do that, we need to create a new package named controllers in our pet-clinic-web module. And inside that, we will create a new Java class named IndexController.
package com.flt.petclinic.controllers;

import org.springframework.stereotype.Controller;
import org.springframework.web.bind.annotation.RequestMapping;

@Controller
public class IndexController {

    @RequestMapping({"","/","index","index.html"})
    public String index() {

        return "index";
    }
}
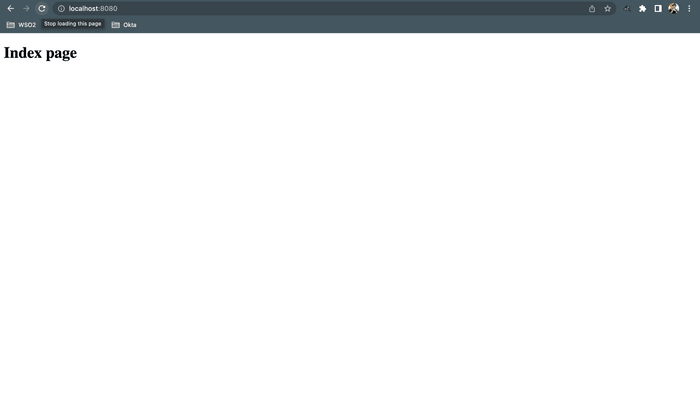
And now, if you run the PetClinicApplication, go to the browser and type localhost:8080, you will see the following.
Step 12 - Create Vet/Owner Index page and Controller
To create the index page for vets, we can perform the same process that we did in step 11. But for the code quality we will be doing it by creating a new directory named vets inside pet-clinic-web/src/main/resources/templates. After creating the directory we can create another index.html inside vets package.
<!DOCTYPE html>
<html lang="en" xmlns:th="http://www.thymeleaf.org">
<head>
    <meta charset="UTF-8">
    <title>Vet Index Page</title>
</head>
<body>
    <h1 th:text="'Index page for vets'">Index page for vets</h1>
</body>
</html>
After creating the index.html file, create a new controller inside our controlllers package, named VetController.
package com.flt.petclinic.controllers;

import org.springframework.stereotype.Controller;
import org.springframework.web.bind.annotation.RequestMapping;

@Controller
public class VetController {

    @RequestMapping({"/vets", "/vets/index", "/vets/index.html"})
    public String index() {

        return "vets/index";
    }
}
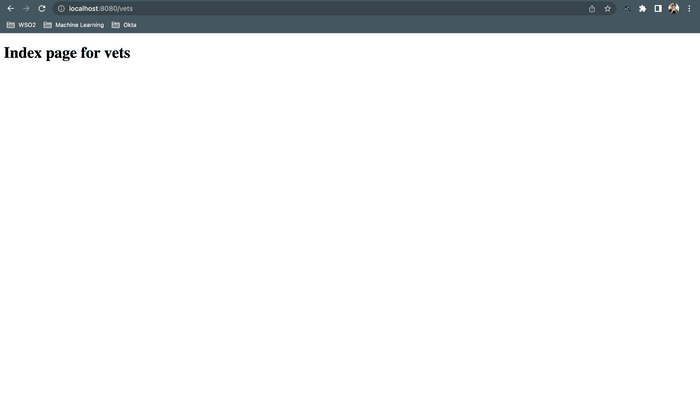
And if you run PetClinicApplication, go to the browser and type localhost:8080/vets, you will see the following.
Following step 11 and step 12, we can create the index page for owners as well.
<!DOCTYPE html>
<html lang="en" xmlns:th="http://www.thymeleaf.org">
<head>
    <meta charset="UTF-8">
    <title>Title</title>
</head>
<body>
  <h1 th:text="'Index page for owners'">Index page for owners</h1>
</body>
</html>package com.flt.petclinic.controllers;
import org.springframework.stereotype.Controller;
import org.springframework.web.bind.annotation.RequestMapping;
@Controller
public class OwnerController {
@RequestMapping({"/owners", "/owners/index", "/owners/index.html"})
public String index() {
return "owners/index";
}
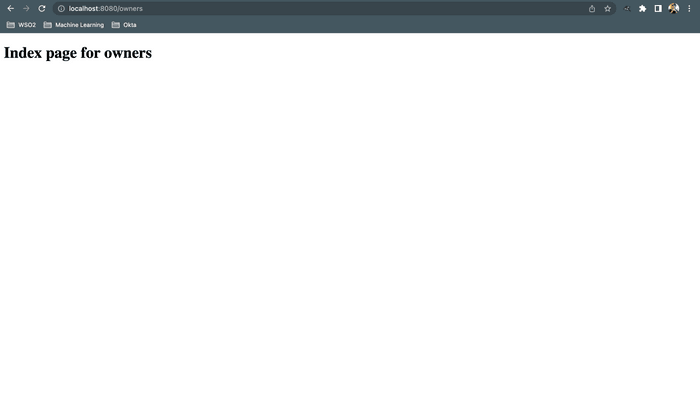
}And And if you run PetClinicApplication, go to the browser and type localhost:8080/owners, you will see the following.
As we can see that all the requests of OwnerController starts from owners/ and all the requests of VetController starts from vets/ we can refactor those classes to following.
package com.flt.petclinic.controllers;

import org.springframework.stereotype.Controller;
import org.springframework.web.bind.annotation.RequestMapping;

@RequestMapping("/owners")
@Controller
public class OwnerController {

    @RequestMapping({"","/", "/index", "/index.html"})
    public String index() {

        return "owners/index";
    }
}package com.flt.petclinic.controllers;
import org.springframework.stereotype.Controller;
import org.springframework.web.bind.annotation.RequestMapping;
@RequestMapping("/vets")
@Controller
public class VetController {
@RequestMapping({"", "/", " /index", " /index.html"})
public String index() {
return "vets/index";
}
}Step 13 - Load data on startup
To do this we will create a new package in pet-clinic-web/com/flt/petclinic named bootstrap.Inside that we will create a new class named DataLoader. But to use this new class we need to update the OwnerServiceMap, VetServiceMap and PetServiceMap classes first.
package com.flt.petclinic.services.map;

import com.flt.petclinic.model.Owner;
import com.flt.petclinic.services.OwnerService;
import org.springframework.stereotype.Service;

import java.util.Set;

@Service
public class OwnerServiceMap extends AbstractMapService<Owner, Long> implements OwnerService {

    @Override
    public Set<Owner> findAll() {

        return super.findAll();
    }

    @Override
    public void deleteById(Long id) {

    }

    @Override
    public void delete(Owner object) {

    }

    @Override
    public Owner save(Owner object) {

        return super.save(object.getId(), object);
    }

    @Override
    public Owner findById(Long id) {

        return super.findById(id);
    }

    @Override
    public Owner findByLastName(String lastName) {

        return null;
    }
}package com.flt.petclinic.services.map;
import com.flt.petclinic.model.Vet;
import com.flt.petclinic.services.VetService;
import org.springframework.stereotype.Service;
import java.util.Set;
@Service
public class VetServiceMap extends AbstractMapService<Vet, Long> implements VetService {
@Override
public Set<Vet> findAll() {
return super.findAll();
}
@Override
public void deleteById(Long id) {
super.deleteById(id);
}
@Override
public void delete(Vet object) {
super.delete(object);
}
@Override
public Vet save(Vet object) {
return super.save(object.getId(), object);
}
@Override
public Vet findById(Long id) {
return super.findById(id);
}
}package com.flt.petclinic.services.map;
import com.flt.petclinic.model.Pet;
import com.flt.petclinic.services.PetService;
import org.springframework.stereotype.Service;
import java.util.Set;
@Service
public class PetServiceMap extends AbstractMapService<Pet, Long> implements PetService {
@Override
public Set<Pet> findAll() {
return super.findAll();
}
@Override
public void deleteById(Long id) {
super.deleteById(id);
}
@Override
public void delete(Pet object) {
super.delete(object);
}
@Override
public Pet save(Pet object) {
return super.save(object.getId(), object);
}
@Override
public Pet findById(Long id) {
return super.findById(id);
}
}package com.flt.petclinic.bootstrap;
import com.flt.petclinic.model.Owner;
import com.flt.petclinic.model.Vet;
import com.flt.petclinic.services.OwnerService;
import com.flt.petclinic.services.VetService;
import com.flt.petclinic.services.map.OwnerServiceMap;
import com.flt.petclinic.services.map.VetServiceMap;
import org.springframework.boot.CommandLineRunner;
import org.springframework.stereotype.Component;
@Component
public class DataLoader implements CommandLineRunner {
private final OwnerService ownerService;
private final VetService vetService;
public DataLoader() {
ownerService = new OwnerServiceMap();
vetService = new VetServiceMap();
}
@Override
public void run(String... args) throws Exception {
Owner owner1 = new Owner();
owner1.setId(1L);
owner1.setFirstName("Harry");
owner1.setLastName("Potter");
ownerService.save(owner1);
Owner owner2 = new Owner();
owner2.setId(2L);
owner2.setFirstName("Ron");
owner2.setLastName("Weasley");
ownerService.save(owner2);
System.out.println("Loaded Owners....");
Vet vet1 = new Vet();
vet1.setId(1L);
vet1.setFirstName("Hermione");
vet1.setLastName("Granger");
vetService.save(vet1);
Vet vet2 = new Vet();
vet2.setId(1L);
vet2.setFirstName("Fred");
vet2.setLastName("Weasley");
vetService.save(vet2);
System.out.println("Loaded Vets....");
}
}Step 14 - Implement Spring Configuration
Although, in out DataLoader class we initialized OwnerService and VetService inside the constructor, we don't want to do that. What we need to do is letting Spring to configure it.
package com.flt.petclinic.bootstrap;

import com.flt.petclinic.model.Owner;
import com.flt.petclinic.model.Vet;
import com.flt.petclinic.services.OwnerService;
import com.flt.petclinic.services.VetService;
import org.springframework.boot.CommandLineRunner;
import org.springframework.stereotype.Component;

@Component
public class DataLoader implements CommandLineRunner {

    private final OwnerService ownerService;
    private final VetService vetService;

    public DataLoader(OwnerService ownerService, VetService vetService) {

        this.ownerService = ownerService;
        this.vetService = vetService;
    }

    @Override
    public void run(String... args) throws Exception {

        Owner owner1 = new Owner();
        owner1.setId(1L);
        owner1.setFirstName("Harry");
        owner1.setLastName("Potter");

        ownerService.save(owner1);

        Owner owner2 = new Owner();
        owner2.setId(2L);
        owner2.setFirstName("Ron");
        owner2.setLastName("Weasley");

        ownerService.save(owner2);

        System.out.println("Loaded Owners....");

        Vet vet1 = new Vet();
        vet1.setId(1L);
        vet1.setFirstName("Hermione");
        vet1.setLastName("Granger");

        vetService.save(vet1);

        Vet vet2 = new Vet();
        vet2.setId(2L);
        vet2.setFirstName("Fred");
        vet2.setLastName("Weasley");

        vetService.save(vet2);

        System.out.println("Loaded Vets....");
    }
}
What we are doing here is called the dependency injection and we can use @Autowired annotation above the constructor if needed as it is optional.
Step 15 - List Owners
To list the owners first thing we need to do is get a handle on the OwnerService in our OwnerController. After injecting the OwnerService using constructor dependency injection, we inject the dependency.
package com.flt.petclinic.controllers;

import com.flt.petclinic.services.OwnerService;
import org.springframework.stereotype.Controller;
import org.springframework.ui.Model;
import org.springframework.web.bind.annotation.RequestMapping;

@RequestMapping("/owners")
@Controller
public class OwnerController {

    private final OwnerService ownerService;

    public OwnerController(OwnerService ownerService) {

        this.ownerService = ownerService;
    }

    /**
     * List owners in the index page.
     * @param model Model object.
     * @return The index page listing the owners.
     */
    @RequestMapping({"","/", "/index", "/index.html"})
    public String index(Model model) {

        model.addAttribute("owners", ownerService.findAll());
        return "owners/index";
    }
}
And now, we can update the index page of owners to list the owners in our web app.
<!DOCTYPE html>
<html lang="en" xmlns:th="http://www.thymeleaf.org">
<head>
    <meta charset="UTF-8">
    <title>List of Pet Owners</title>
</head>
<body>
<!--/*@thymesVar id="owner" type="com.flt.petclinic.model.Owner"*/-->
<h1 th:text="'List of owners'">Owners List</h1>
<table>
    <thead>
    <tr>
        <th>Id</th>
        <th>First Name</th>
        <th>Last Name</th>
    </tr>
    </thead>
    <tbody>
    <tr th:each="owner:${owners}">
        <td th:text="${owner.id}">1</td>
        <td th:text="${owner.firstName}">Tyrion</td>
        <td th:text="${owner.lastName}">Lannister</td>
    </tr>
    </tbody>
</table>
</body>
</html>
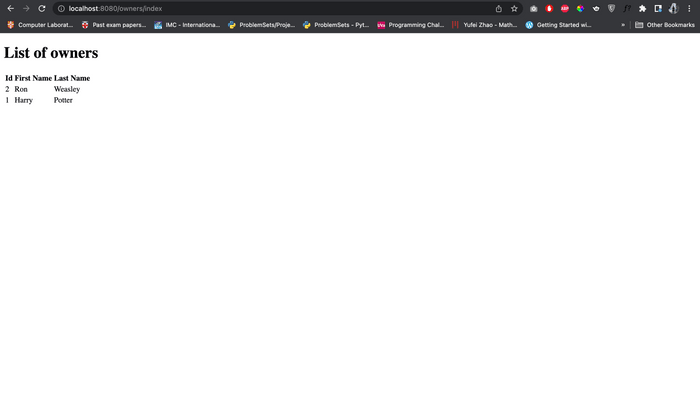
Here, adding the comment <!--/*@thymesVar id="owner" type="com.flt.petclinic.model.Owner"*/--> helps IntelliJ intellisense to identify the Owner object. Now, if you run this and type localhost:8080/owners you will see the following.
Step 16 - List Vets
Following the step 15, we can list the vets.
package com.flt.petclinic.controllers;

import com.flt.petclinic.services.VetService;
import org.springframework.stereotype.Controller;
import org.springframework.ui.Model;
import org.springframework.web.bind.annotation.RequestMapping;

@RequestMapping("/vets")
@Controller
public class VetController {

    private final VetService vetService;

    public VetController(VetService vetService) {

        this.vetService = vetService;
    }

    @RequestMapping({"", "/", " /index", " /index.html"})
    public String index(Model model) {

        model.addAttribute("vets", vetService.findAll());
        return "vets/index";
    }
}
<!DOCTYPE html>
<html lang="en" xmlns:th="http://www.thymeleaf.org">
<head>
<meta charset="UTF-8">
<title>List of Vets</title>
</head>
<body>
<!--/*@thymesVar id="vet" type="com.flt.petclinic.model.Vet"*/-->
<h1 th:text="'List of Vets'">Vets List</h1>
<table>
<thead>
<tr>
<th>Id</th>
<th>First Name</th>
<th>Last Name</th>
</tr>
</thead>
<tbody>
<tr th:each="vet:${vets}">
<td th:text="${vet.id}">1</td>
<td th:text="${vet.firstName}">Jaime</td>
<td th:text="${vet.lastName}">Lannister</td>
</tr>
</tbody>
</table>
</body>
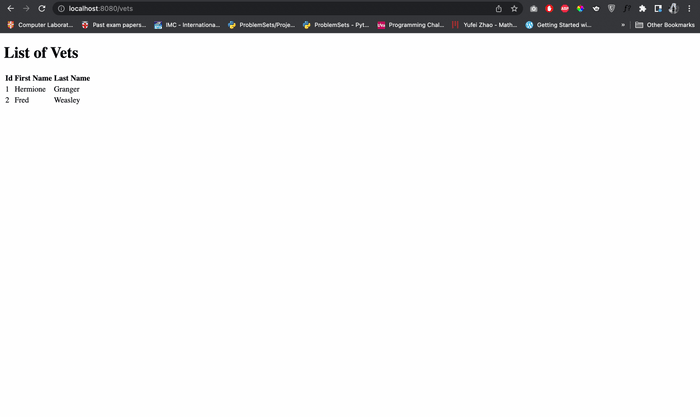
</html>Now if you go to localhost:8080/vets you can observe the following.
Step 17 - Auto Generate Map IDs
To make the ID autogenerate we can implement the following in the AbstractMapService class and refactor the OwnerServiceMap, PetServiceMap and VetServiceMap.
package com.flt.petclinic.services.map;

import com.flt.petclinic.model.BaseEntity;

import java.util.Collections;
import java.util.HashMap;
import java.util.HashSet;
import java.util.Map;
import java.util.NoSuchElementException;
import java.util.Set;

public abstract class AbstractMapService<T extends BaseEntity, ID extends Long> {

    protected Map<Long, T> map = new HashMap<>();

    Set<T> findAll() {

        return new HashSet<>(map.values());
    }

    T findById(ID id) {

        return map.get(id);
    }

    T save(T object) {

        if (object != null) {
            if (object.getId() == null) {
                object.setId(getNextId());
            }
            map.put(object.getId(), object);
        }
        return object;
    }

    void deleteById(ID id) {

        map.remove(id);
    }

    void delete(T object) {

        map.entrySet().removeIf(entry -> entry.getValue().equals(object));
    }

    private Long getNextId() {

        Long nextId = null;
        try {
            nextId = Collections.max(map.keySet()) + 1;
        } catch (NoSuchElementException e) {
            nextId = 1L;
        }
        return nextId;
    }
}package com.flt.petclinic.services.map;
import com.flt.petclinic.model.Owner;
import com.flt.petclinic.services.OwnerService;
import org.springframework.stereotype.Service;
import java.util.Set;
@Service
public class OwnerServiceMap extends AbstractMapService<Owner, Long> implements OwnerService {
@Override
public Set<Owner> findAll() {
return super.findAll();
}
@Override
public void deleteById(Long id) {
}
@Override
public void delete(Owner object) {
}
@Override
public Owner save(Owner object) {
return super.save(object);
}
@Override
public Owner findById(Long id) {
return super.findById(id);
}
@Override
public Owner findByLastName(String lastName) {
return null;
}
}package com.flt.petclinic.services.map;
import com.flt.petclinic.model.Pet;
import com.flt.petclinic.services.PetService;
import org.springframework.stereotype.Service;
import java.util.Set;
@Service
public class PetServiceMap extends AbstractMapService<Pet, Long> implements PetService {
@Override
public Set<Pet> findAll() {
return super.findAll();
}
@Override
public void deleteById(Long id) {
super.deleteById(id);
}
@Override
public void delete(Pet object) {
super.delete(object);
}
@Override
public Pet save(Pet object) {
return super.save(object);
}
@Override
public Pet findById(Long id) {
return super.findById(id);
}
}package com.flt.petclinic.services.map;
import com.flt.petclinic.model.Vet;
import com.flt.petclinic.services.VetService;
import org.springframework.stereotype.Service;
import java.util.Set;
@Service
public class VetServiceMap extends AbstractMapService<Vet, Long> implements VetService {
@Override
public Set<Vet> findAll() {
return super.findAll();
}
@Override
public void deleteById(Long id) {
super.deleteById(id);
}
@Override
public void delete(Vet object) {
super.delete(object);
}
@Override
public Vet save(Vet object) {
return super.save(object);
}
@Override
public Vet findById(Long id) {
return super.findById(id);
}
}In addition, we can refactor out DataLoader class as well.
package com.flt.petclinic.bootstrap;

import com.flt.petclinic.model.Owner;
import com.flt.petclinic.model.Vet;
import com.flt.petclinic.services.OwnerService;
import com.flt.petclinic.services.VetService;
import org.springframework.boot.CommandLineRunner;
import org.springframework.stereotype.Component;

@Component
public class DataLoader implements CommandLineRunner {

    private final OwnerService ownerService;
    private final VetService vetService;

    public DataLoader(OwnerService ownerService, VetService vetService) {

        this.ownerService = ownerService;
        this.vetService = vetService;
    }

    @Override
    public void run(String... args) throws Exception {

        Owner owner1 = new Owner();
        owner1.setFirstName("Harry");
        owner1.setLastName("Potter");

        ownerService.save(owner1);

        Owner owner2 = new Owner();
        owner2.setFirstName("Ron");
        owner2.setLastName("Weasley");

        ownerService.save(owner2);

        System.out.println("Loaded Owners....");

        Vet vet1 = new Vet();
        vet1.setFirstName("Hermione");
        vet1.setLastName("Granger");

        vetService.save(vet1);

        Vet vet2 = new Vet();
        vet2.setFirstName("Fred");
        vet2.setLastName("Weasley");

        vetService.save(vet2);

        System.out.println("Loaded Vets....");
    }
}
References
This list contains the tips and tricks that you should know when diving into Spring development.
- Dependency Injection
